Showing posts with label Mixed Up Craft. Show all posts

Friday, June 10, 2022

Tri-Fold Stepper Card

Today´s cardstyle is a fold I have had on my "to make" list for quite some time now. I liked it from the very first time I saw it, but as I wasn´t able to sit and craft do to prolapses in my back at the time, I kind of forgot about it. The other day a fellow crafter posted her version of it, and I decided to make one as well.
The tutorial I originally saw on how to make this card, was by Sam Calcott from Mixed Up Craft, and it involved making several templates to get the layers right. I decided I wanted both a mat and a layer, and I ended up making yet another template. It took me a while to figure out how to best do it, but once I got the hang of it, it went fairly quickly. I used digital papers for my patterened papers, and I spent quite a bit of time deciding which ones to use. In the end I settled on some sunflower papers that I purchased from LoveJunkJournals at Etsy.com. I layered that on top of a sunflower yellow mat. I chose black licorice from Lawn Fawn for my card base.
For the back of the card I decided to cut out a piece of white paper and ink up the edges with sunflower yellow ink from Lawn Fawn. The sunflower colored cardstock I used for my layer is also from Lawn Fawn.
I added a sentiment, some bees and sunflowers which were fussycut from my digital papers, and some adhesive enamel dots to finish off the front of the card.
The tutorial I followed:

Tuesday, April 5, 2022

Milk Carton Gift Boxes

I had lots of fun this weekend making these two milk cartons! Planning the lay-out, stamping, masking, ink blending and coloring took quite a lot of time, but I enjoyed myself, which is what is important! And I actually love how they turned out☺️! Filled with chocolate, they will be a nice alternative to the more common candy-filled Easter Eggs.
There are tons of easy to adapt tutorials out there, and you can almost make it whatever size you want. I have made several Lidded Milk Cartons following one of The Paper Pixie´s easy to follow tutorials before. They are super cute, however, this time I wanted my cartons to be a little bigger, and I remembered that I had made one a while back, (
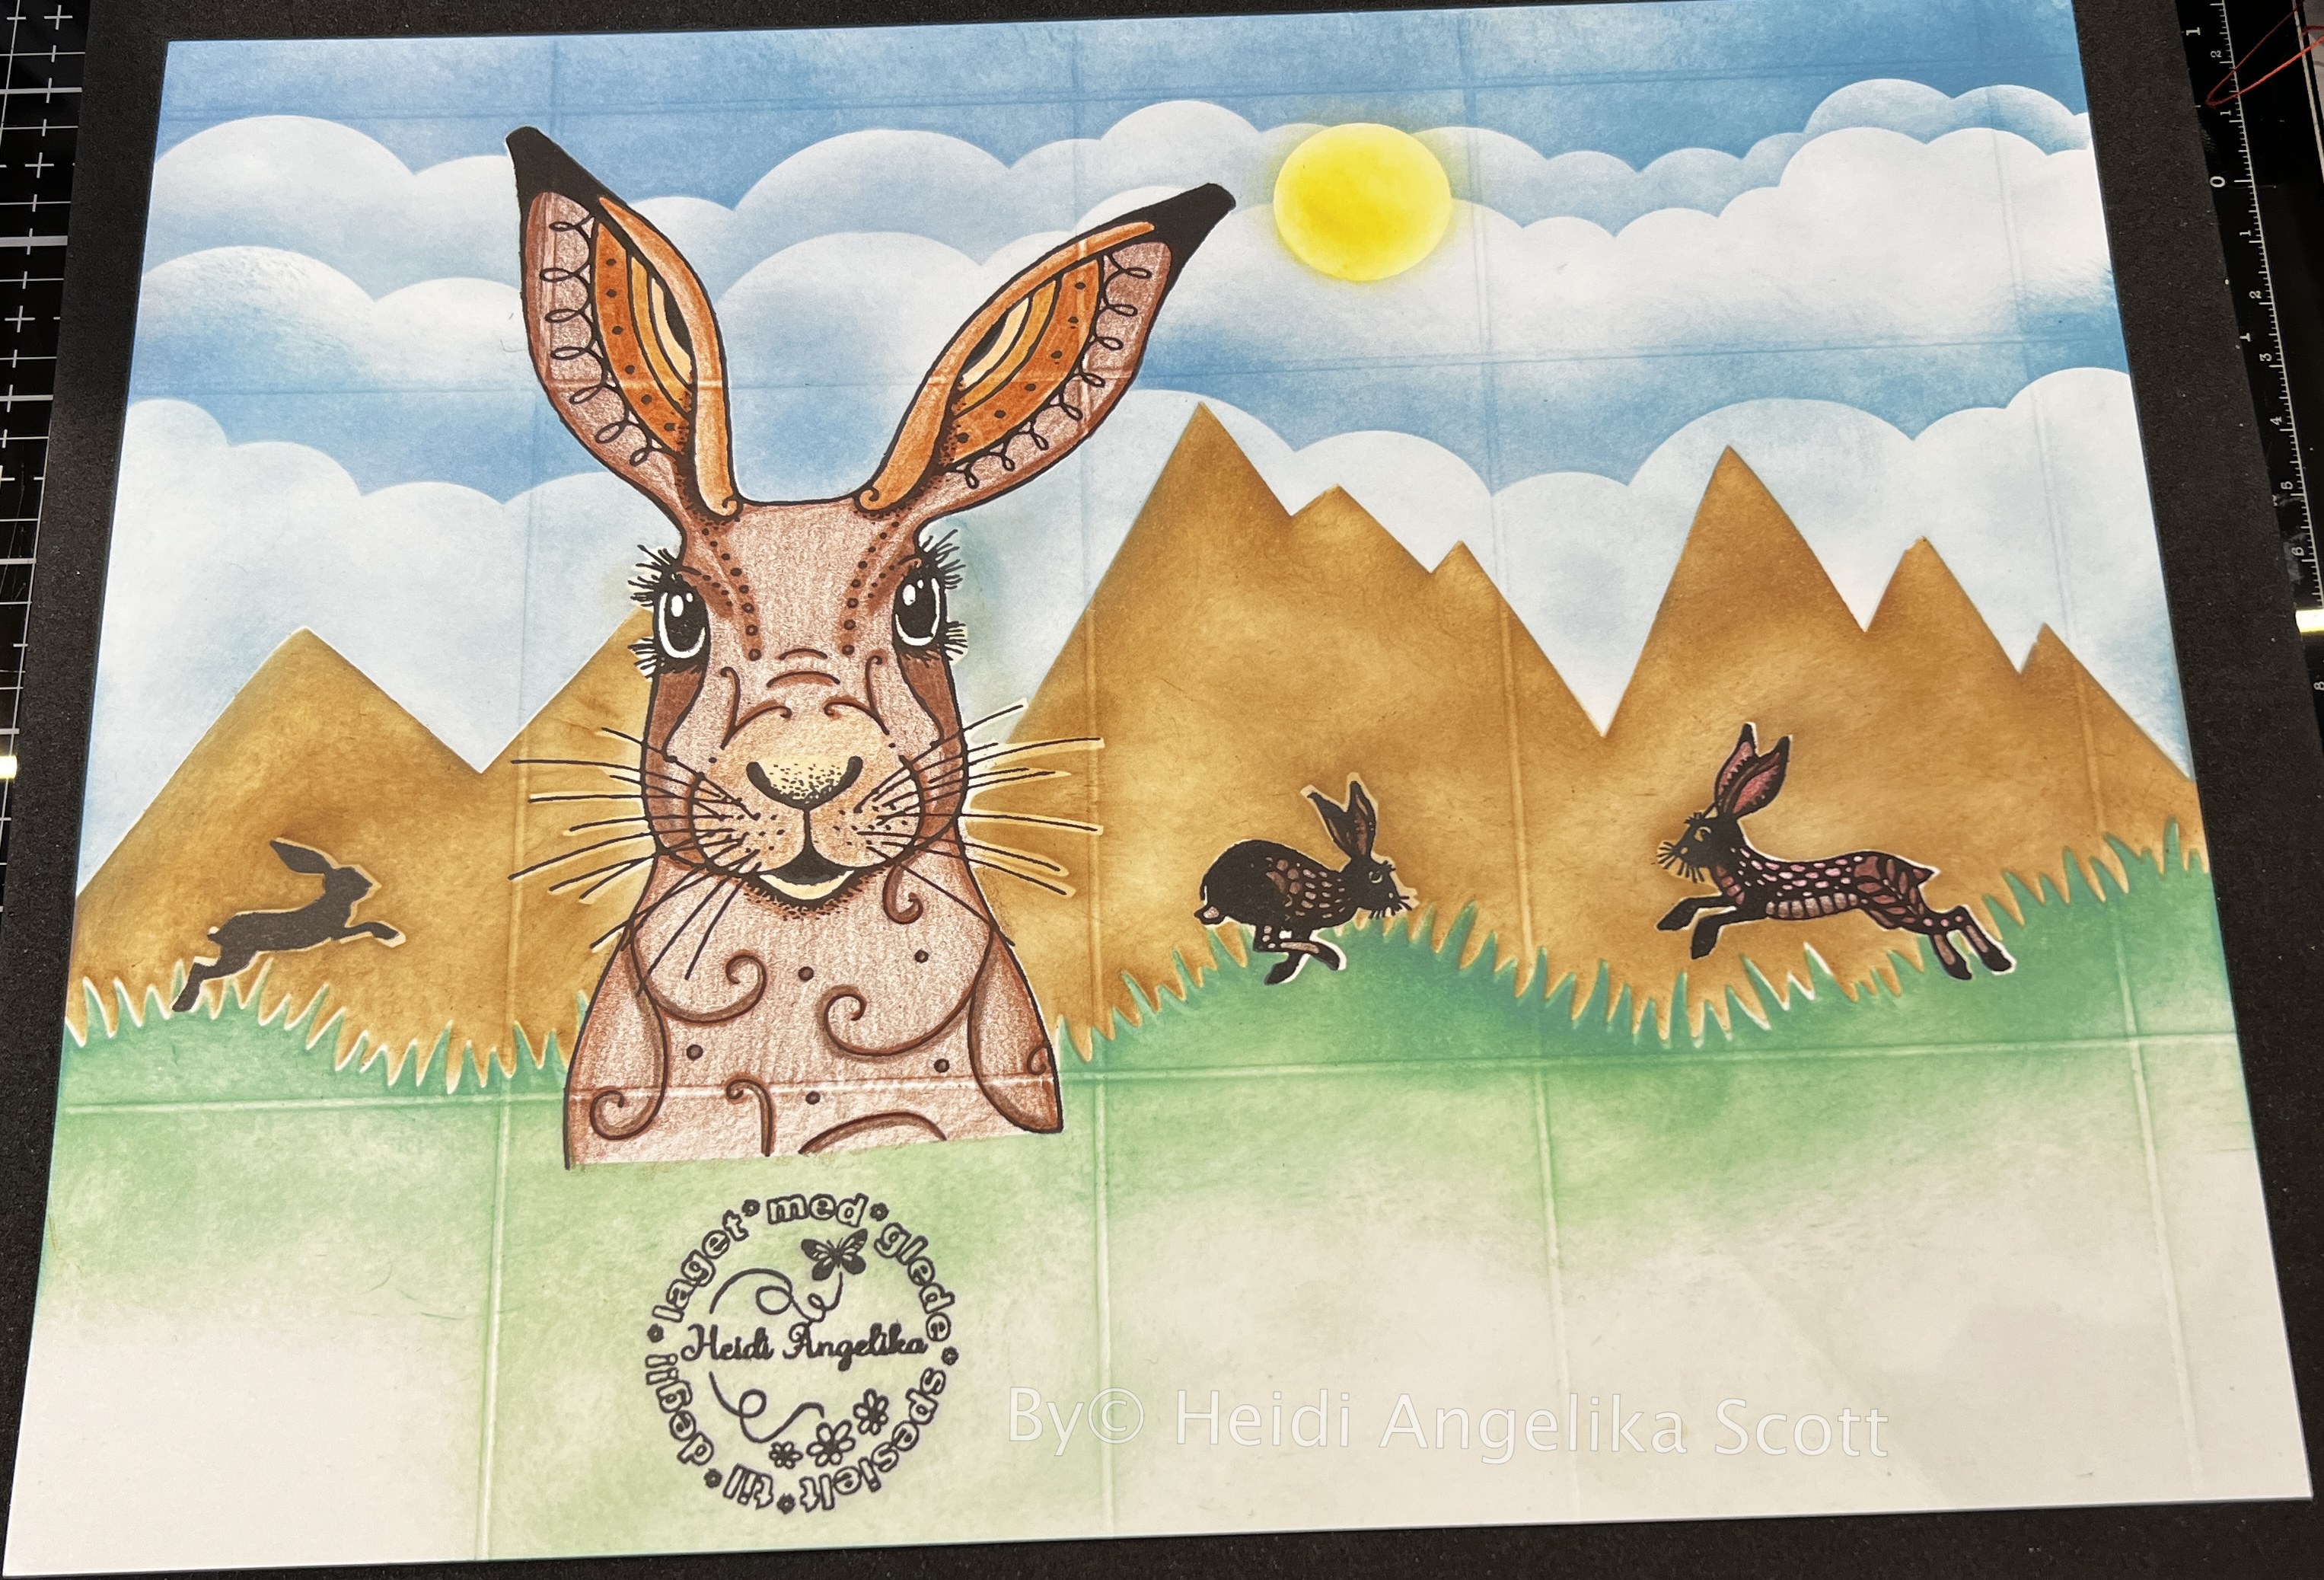
you can see my blogpost about it here) crafting along with Sam Calcott on one of her Facebook lives. I used the same method of decorating on these two cartons, stamping an image, that I then masked, before ink blending my background. It is always so much fun to remove the masking and see the image pop out bright white amongst all the colors of the background! I then spent quite some time coloring in my main images.
For my backgrounds I used stencils from Lawn Fawn; the slimline cloudy stencils and the slimline grassy hillside stencils. I also drew and cut a mountain on a sheet of acetate, as I don´t have any mountain stencils.
Unfortunately I had forgotten that there was a small mistake in the live, when it comes to where to cut or not, so even though I love the results of my cartons, they were supposed to be whole/not cut at the top. Oh well, they work with the flaps, as well😃, and now I will most likely remember the next time I make one😉.
- Before cutting into the paper -
- After cutting -
- After gluing the sides together -
- Close up of the brown rabbit -
- The brown with the bottom folded and glued -
- Close up of the grey rabbit -
- The grey with the bottom folded and glued -

Thursday, March 31, 2022

Letter Gift Boxes

I first heard the idea of Letter Gift Boxes when I saw Mixed Up Craft´s tutorial on the letter "M". It was one of this years makes in Sam Calcott´s Mothers Day Series - "M" for Mother/Mothers Day. I thought it would be perfect as a little gift for my young nephew Mats André, filled with treats, of course. Therefore I decorated it with a theme I thought he would appreciate, papers from the Circus series from Craft Consortium. I also die cut a banner and letters to spell his name, which I glued to the front of the box. I then filled it with lots of different chocolate treats.🍫
The banner with his name.
The back side of the box.
A sideview showing the opening of the box.
When I had finished the "M" box, I felt like I was kind of on a roll, so I decided to try to make others. I initially wanted to make a "C" next, as one of my sisters names starts with a "C". I ended up struggling with that for quite a while, before I decided to put it aside and do a much easier letter first, namely "L". I thought that even someone as bad as I am in math, could figure out the measurements for an "L".😂 And I did, it wasn´t that hard at all. I wanted this to be a birthday card/gift to my brother-in-law, as his name starts with the letter "L". He loves his beer, so I decorated it with papers from Papirdesign, a series called "Mens vi venter" I used stamps from Papirdesign, and unbranded dies to make the decorations, and filled this with chocolates, as well. His birthday is coming up in April, so I haven´t given this to him yet, but I highly doubt that he ever visits my blog, so there is hardly any danger of him seeing it.
The open box.
I have not made any more Letter Gift Boxes yet, but as I suddenly remembered that I have a Brothers ScanNCut, making the actual letters is not a problem at all. It is the edges that links the front to the back of the box, that takes time to figure out. So as of now, I have both the letter "C" and the letter "G" lying around waiting to be turned into boxes. When that will happen, I don´t know...😂! Mixed Up Crafts tutorial for the letter "M".

Tuesday, August 4, 2020

Building Block Card


On Friday, the 31st of July, Sam Calcott of Mixed Up Craft was going to do another Facebook Live. Unfortunately I didn't have the chance to watch, as I had a service appointment with my car that I had to go to. During that Live she made this beautiful card, a Building Block Card or a Block Card, if you like. Luckily for me though, she put up a YouTube tutorial on how to make the card really soon thereafter, as I didn't really feel like watching the live after the fact.
So yesterday I made this card, that I am really happy with! I absolutely adore the papers I have used. They are from the series "Little Fawn and Friends" from Craft Consortium. I decided to use Norwegian sentiments on the card, as I more often end up sending cards to Norwegian friends, as supposed to English speaking ones. The sentiments are all about having courage, and therefore I have simply called the card "Mot!", or "Courage!" in English. The sentiment says. "Courage to do what you dare not do."
This is a card that was a lot easier to make than I initially thought, much because of the great tutorial 
Sam Calcott has made.


I kept the theme of being courageous on the back of the card with another sentiment that says "What would life be if we didn't have the courage to try?"


I thought the card deserved a matching envelope.


Building Block Card tutorial by Mixed Up Craft


Monday, August 3, 2020

Mens Polo Shirt Card


My mom asked me the other day if I could make a birthday card for her. It was going to be for a toddler who turns two, and since I have wanted to try out making a shirt card for a while, I thought if I could find some fun papers, it could work as a card for a two-year old. I went into my downloadable papers and found this really adorable dinosaur patterned one. Since the card called for a double sided print, I choose the other pattern, the stars, as the backside of the dinosaurs. 
I followed Mixed Up Crafts tutorial on how to make this card, and it turned out to be a very easy AND fun card to make!😃

I thought the inside of the card looked rather plain, so I fussy cut one of the dinosaurs, and stuck it on the inside.

In hindsight I thought I needed to show the age on the front of the shirt, so I die cut the number two, and stuck it on the shirt pocket.


I decided to make an envelope to match the card, so I stuck on a scrap piece of paper that was left over after making the card.


Mixed Up Crafts very easy to follow tutorial for this card.


Wednesday, July 29, 2020

Penta-Cube Pop Up Box Card


Todays post is a card style that I swore I wouldn't do. Actually, I swore I wouldn't do it when it was a Triple-Cube Pop Up Box Card, however, then Sam Calcott from Mixed Up Craft did a FaceBook Craft-along doing the same card, only having five cubes instead of three, and since I wanted to craft-along with her, I had to try it out. The reason I wasn't going to make one of these cards, was that I can't really see who I should give it to, and for what occasion. 
It is actually a card that would work perfectly for any occasion, and I have chosen to make it into a friendship card, using Norwegian sentiments on it. 
It is a relatively easy card to make, it does, however, require cutting LOTS of mats and layers. Since I followed the live when I made this, I ended up gluing the whole thing together before adding my mats and layers, however, I would definitely recommend doing the decorating before putting it together, while everything is still flat.


Surprisingly, this card folds flat, and since it is a 5"x7" card, although a little bulky, it should be able to fit in a 5"x7" envelope. I have made a 5"x7 1/2" envelope to have a little more space. 


Mixed Up Crafts tutorial for the Penta-Cube Pop Up Box Card

Mixed Up Crafts tutorial for the Triple-Cube Pop Up Box Card


Monday, July 20, 2020

Birthday Surprise


The card closes with ribbon.

This Six Panel Folio Book Card inspired by Mixed Up Craft, is a birthday card commission I did for a neighbor. 
I used silver metallic card stock as the base, and alternately added red and white card stock on top. To make this card as simple as possible, I decorated the card base with small panels of silver, and topped these, again alternately, with red and white card stock to be written on. I then made tiny "bouquets" of small red and white roses and glued them on with hot-glue.
The front of the card was decorated with a small post card from the "Miss Margit - In the Garden Collection" from REPRINT, as well as another small bouquet of roses. Silver Nuvo Drops add the final touch.


The inside of the card with the box lying in front.


The only thing that shows that this is a birthday card is a small panel with a silver heat embossed "Happy Birthday" in Norwegian.
The same silver metallic card stock is used as the connection between the individual panels.


The card is rather thick when it is rolled together, and I had to make a fairly deep box to hold it. It is decorated in the same style as the card, with silver and red, and I have used the same postcard from REPRINT to decorate the closure flap of the box, as on the first panel of the card. The roses that I have added on the front, are a little bit bigger than the ones inside the card.


Monday, June 1, 2020

What is it with purple and butterflies?!

One color card making - Wilted Violet
 Todays post were two fairly quick cards from the other day, both made as a result of a Live Craft along with Sam Calcott from Mixed Up Craft. She was making one colored cards, and since I came a bit late into the live, I decided I wouldn't craft along with her. So I ended up pulling out a new frame die I had just received, and started making a shaker card with it, It has 5 compartments in it that just screams out shaker card to me😂! So, while others were making their versions of one colored cards, I stuck to making my shaker. I die cut my frame in foam and glued it on the background, before filling four compartments with different colored glass jewels and the largest compartment with tiny butterflies. I then closed it up with acetate and glued on the frame that I had die cut in purple. Was a bit irritated when I saw that the foam die cut I had used was a bit larger than the card stock die cut, as the foam had stretched a bit during the die cutting process. Oh well, I guess I will have to live with it. Lastly I stamped a sentiment on some purple card stock, die cut some butterflies in a lighter purple, stuck them on vellum and decorated with Nuvo Drops.
Shaker card using two different purple cards stocks.

Afterwards however, I decided to make my version of a one colored card.
I chose the distress oxide ink color wilted violet, and varied the pressure of my ink blending to create different shades of purple. I had a ribbon that was approximately the same purple which I added, along with two butterflies that I had die cut out of ink blended card stock. These were glued on top of vellum that had a nice shimmer. I stamped my sentiment on white, also using the same distress oxide Wilted Violet ink. Last but not least, I finished the card off with some Nuvo Drops, which did not work as they usually do, as they didn't collapse on themselves and dried in peaks instead😢.


All in all I am quite pleased with both my purple butterfly cards🦋💜!


Easy Fold-Over Cards

Lately I have been hooked on making a simple fold-over card, that you can easily make into a gift card/tag-pocket card. Once again...