Saturday, January 25, 2020

Teddies for you.

Teddies for you.
cardsbyheidiangelika.com
Tried another, for me, new technique today - Triple Layer Stamping Card. Found a couple of tutorials on yet another FB card making page that I follow, Cardmaking Tutorials, Support & Inspiration and since I have admired this type of cards for some time now, I just had to try to make one after having seen the tutorials. 
https://scrappy-hour.com/…/triple-time-stamping-tutorial-t…/
https://www.splitcoaststampers.com/…/tutori…/triplestamping/

I used a couple of stamp sets that I have, stamped, and then I colored the stamps with Copic Markers.
I love the effect the matting gives the card and I found it both an easy and fun card to make!

Thursday, January 23, 2020

Love

Valentines Day is closing in, and I have been busy creating love themed cards lately. They are not made with your typical Valentines Day colors, pink and red, but I have chosen to use a different color palette.

The card I wanted to share today is a shaker card. I chose to use a background I created some months ago, when I made a distress oxide "watercolor" by stamping ink on my Tim Holtz Glass Media Mat (rangerink.com, bikuben.com), and spraying water on the ink stain. I then put my card stock face down into the watery ink until it was completely covered with the ink/water mix, and then I misted it with Perfect Pearl Mist (Perfect Pearls also by Ranger, mixed with water) to get a glittery look. I debated with myself which die I was going to use, but ended up with a really beautiful die that is used to cut out part of the  card front.
The die I used, is an unbranded die I have bought on wish.com.

I held the card front up against both black and blue, and decided to go with a black card. I also decided that the die I had used would look good as a shaker card. As always when I make cards I find myself having problems along the way, and this card was no exception. The problem arose when I was going to close the shaker card, as I had the shaker filler inside the front of the card, and couldn't use my regular method of centering the front to the actual card. I ended up winging it, and of course it got a little crooked. 
I die-cut the word love three times out of black cards stock, stacked, and glued them together for some dimension, put some glossy accents (rangerink.com) on the black and let it dry before adhering it onto my card. I finished the card off with some enamel dots from the KSCRAFT Store at AliExpress.com.


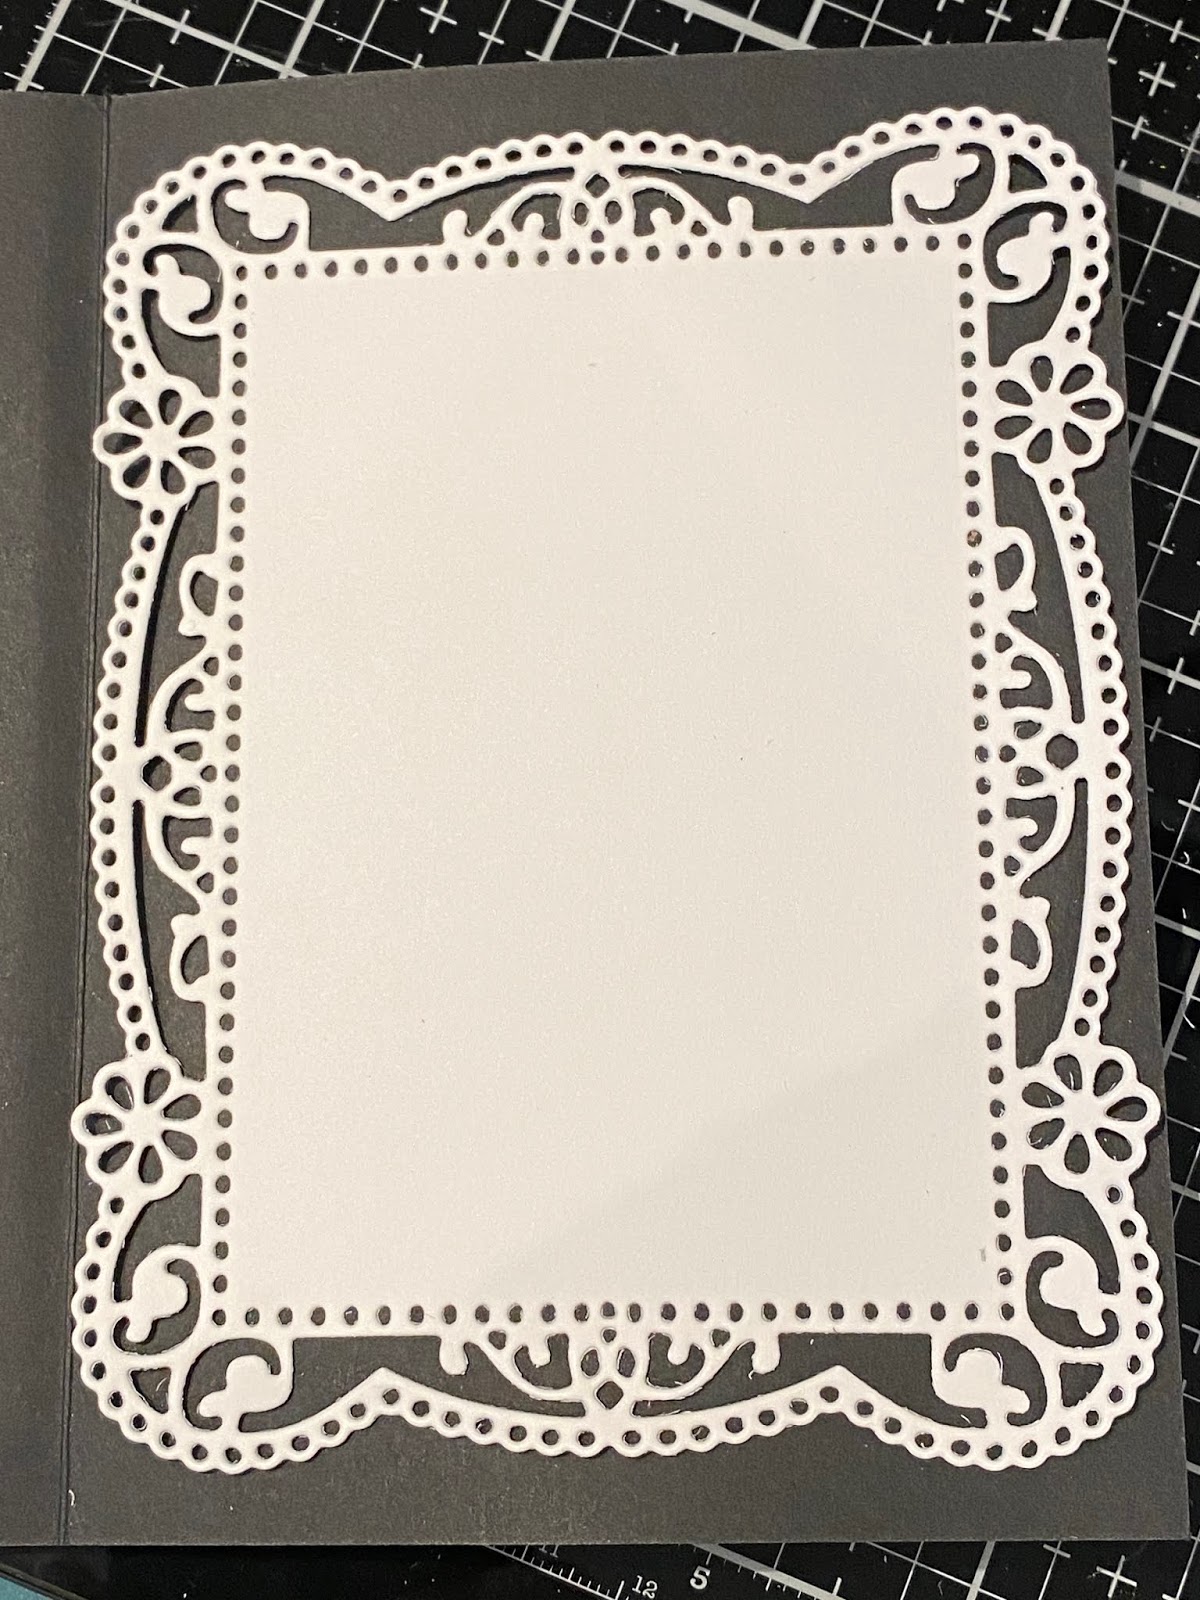
Since the card is black, I wanted to make it a little easier to write inside it, so I die-cut out an intricate frame without removing the middle part of it.
With an intricate and decorative white die-cut inside the card, it is a lot easier to write a message for someone.

Wednesday, January 22, 2020

More interactive cards.

I love that the FaceBook group that I am in have monthly challenges, as it challenges me to try new techniques and to create cards that I never would have otherwise. The online craft store that I mentioned in my last post, s-craft.no, also has monthly challenges, and it so happens that this month the challenge is the same in both groups, interactive cards. Therefore I have created a few more cards with the challenges in mind. First I did yet another Reveal Wheel Card using my Reveal Wheel dies from Lawn Fawn. I have called it "Make a Wish"

 To make this card I decided to use some of my Distress Oxide Sprays from Ranger, rangerink.com, (I have bought them at bikuben.com, another great craft store I use) to create my own background. I used black soot, blueprint sketch, a little broken china and some squeezed lemonade to create the yellow "blobs".
My Distress Oxide Sprays from Ranger

The fairy is from a coordinating stamp and die-set that I have. The fairy is colored with Copic Markers. The sentiment is from the same stamp set.

With the next card I created, I also went for something I haven't tried before, a slider card. You can get dies for making this type of card as well, but I decided to just make my own slider, by using border dies. This worked out really well. I called this card "Oh so happy"

Made with another coordinating stamp and die-set, and colored with Copic Markers. 
Inside the card I stamped "for a friend like you", and on the envelope I stamped "hugs".

Saturday, January 18, 2020

Reveal Wheel Cards

A while back I decided to teach myself how to make Reveal Wheel Cards. I had seen many really cute cards both on Pinterest and on Facebook, and one of the FB card making groups I follow has interactive cards as their January challenge. So instead of just making shaker cards, I decided to try something new. In order to do this I needed some new dies and I had an inkling that one of the online craft stores I use, s-craft.no would have them. Which they did! I ordered the "Lawn Fawn Reveal Wheel Custom Craft Dies", along with a bunch of "add-ons", and a few days later I received them in the mail.

I started by going to youtube to see if I could find some how-to videos, which turned out to be too much of a success as there were way too many videos to choose from. I settled on a video by Jennifer McGuire, my go-to card making guru, and found a video in which she showed the process in an understandable and clear way. https://youtu.be/0N7XzA5uf3I
I didn't watch the whole video right away, but watched as I tried to follow along. I had cheated a bit and precut a few of the card bases and stamped them already, so when I saw how Jennifer stamped her card and then masked what she had stamped in order to create a background for her image, I got lost as I don't have masking paper. I realized much much later that I do indeed have some masking paper I could have used. Oh well, I can use that on a later card😌. 
So now I had stamped my images on the card fronts, and was faced with the problem of creating backgrounds on the cards. I decided to use some of my watercolor pencils to simply creating a blue sky and a green grass backdrop, not worrying too much that my paper would get warped. I created three really cute porcupine motif card bases.


Then I colored in my simple backgrounds, added water and warped the paper. I used "Perfect Colouring Paper" as I was going to color in my critters with Copic Markers and this is paper that is designed to withstand the alcohol markers without bleeding. This does, however, not mean that it doesn't buckle when you put water on it. Ultimately I don't think it will matter, as I can straighten them out by either weighing them down or even use an iron on them. 
After doing the backgrounds I colored them in.

I then started to assemble the cards. I had created the back for the cards by putting the wheel on with a small brad.
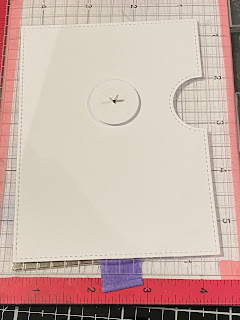
Using the tip of how you should not see any of the indented lines in your little reveal window and in the cut-out where the turning of the wheel happens, I was able to assemble the mechanism quite easily. It was when I went to stamp in my little reveal sentiments on the wheel I started having issues. Jennifer McGuire shared a tip she had learnt of marking the wheel at 12, 3, 6 and 9 o'clock, and then drawing in the shape of the window with pencil in the opening of the wheel, a tip I did not have too much success with, and I actually ended up ruining my first couple of wheels because I stamped in the wrong places. I went ahead and assembled the top part of my card to the backing anyway, and realized that the front REALLY needs to be flattened out before being adhered to the back part of the card. The result is that I have my little sentiments either too high up, too much to the left or too much to the right in the window. I will probably end up trying to force my card apart to try and salvage the front.

Anyway, I decided to put the porcupine cards to the side and start a completely new card using a different technique for the background. So I went ahead and used distress oxide inks and a stencil to daub in the sky and some ground. Then I just slayed out my stamps in the places that I wanted to have the image.


This was when I understood why Jennifer McGuire stamped and then masked her image BEFORE making the background. Although I wasn't faced with too much of a problem, as the solution of course was to die cut the motives and then adhering them to the background after I had colored them in. If I hadn't used a stamps I had coordinating dies to, I could have fussy-cut the motives out.
I was able to stamp the sentiments on in an acceptable way, and assembled the card to finish it. I added some purple Wink of Stella on the butterflies and some clear Wink of Stella on the deer.

After all that work and brain twisting, I was rather happy with how the card came out. Although I have to mention that I wasn't able to assemble the card totally without mishaps!! (I have realized that I am an expert at ruining my cards with tiny mishaps like stamping mistakes or fingerprints, or crooked assembly....if there is something that can go wrong with a card, you can be sure that it has happened to me!) This time I managed to be a bit impatient and put my thumb nail onto the arrow I had just printed to show which way to turn the wheel, and of course I managed to get an imprint of my nail on a white part of my card. I tried to erase it, but my erasers aren't ment for erasing ink, so I ended up removing it another way. 

This is the finished card:


Wednesday, January 15, 2020

Copic markers.

I am not very experienced with, hence not comfortable coloring with Copic markers, but since I have invested money in getting some, I do need to challenge myself to use them. So, yesterday I decided to sit down and play around a little with them, and I ended up coloring in some roses and leaves that I fussy cut out afterwards. I figured that I couldn't´t just color something without trying to make the end result into a card, so I did. I just finished this simple card using my copic colored roses and leaves.
I stamped Amazing on it and finished it off with some distress oxide ink along the edge (barn door) and some marigolds and some dark red pearls. 

Monday, January 13, 2020

Long time, no postings...

I need to get better at posting my card activity here on my blog. I have been busy sharing on a page I follow on Facebook, and have not taken the time to put out any of my projects in here or on my netsite cardsbyheidiangelika.com. Since I last posted, I have created several cards, although I feel that the Christmas card production took most of my time.

I did make a card though, just because........


that really put me through the ringers....for the simple reason that the background die I was using didn't want to provide me with a clean cut. I managed to make a card, nonetheless. I decided to use the background die-cut result I got and work around it.

This is how the background was supposed to look, but I only got a partially cut result. I chose to color all the little inlays with metallic markers and replace them back into where they had originally been. Then I die cut out labels to cover up the part that had not cut out. I layered them and heat embossed a sentiment in white. 
When I was gluing all the little pieces back in to the background I found out that metallic markers are really messy to work with on tiny objects, as I got metallic ink all over my fingers which resulted in messes on my card stock. Therefore I ended up trying to "fix" the card by adding wink of stella in purple and clear. 
I am fairly happy with the result, although I wish that I had just taken the time to wash my hands instead of getting metallic ink everywhere.
Inside the card I stamped:
and on the envelope "long distance hugs" (visible on the picture with the card).


Monday, December 2, 2019

Merry Christmas Santa

Yesterday I was back to making Christmas cards, and the card of the day turned out to be a very fun card to make. As usual I went to Pinterest for inspiration, where I found a card with layering that I liked. I sketched it out in my sketch book, tweaked it a little and then I went to create the card.
This is the finished result.


I am a little surprised that it takes me so long to make one single card, but with the coloring (which I am not comfortable with...) of the stamp and all the measuring, cutting and layering, I guess I shouldn't be too surprised. I assume as I get more practice, it will take me a lot less time.
On this card I used a 6"x6" (15x15cm) card-base. I then used the Christmas Season - Trim the Tree patterned paper from Maja Design which has different patterns on each side. I used one of the sides of the paper to cut a piece of paper that was just slightly smaller than the front of the card, and the other side of the paper to cut a panel that was a little smaller than half the card. This I mounted on some red card stock, and glued a red ribbon to the top. I then cut a smaller panel of water color paper that I mounted on the same red card stock, before mounting this to a dark green panel, just slightly bigger than the red. Oh, I had already stamped Merry Christmas with Vermillion LETTERit Archival Ink from Ranger, before mounting it on the other two. I did the upper panel the same way, layering green, red and white, then I added a colored Santa that I stamped and cut out with coordinating dies. Last but not least I added some red gemstones.

Easy Fold-Over Cards

Lately I have been hooked on making a simple fold-over card, that you can easily make into a gift card/tag-pocket card. Once again...